adobe tips
acrobat
dreamweaver [subpage]
fireworks
lightroom
encore
photoshop
photoshop elements
powerpoint
bridge
flash
soundbooth
illustrator
training videos: photoshop premiere all
acrobat
2025-04-07 turn off "AI generative" prompt in Android when any .pdf is opened
key is that preferences are not available when a document is open, so close the document first [so stupid]
Preferences > Generative AI->Enable generative AI features in Acrobat
disable "turn this image into a pdf to high light text..." notification
in settings, open the app, then choose notification categories and turn off "Downloads"
making acrobat x pro default (rather than opening reader)
from 2021-10-06 .txt file
after installing acrobat x pro on elitebook everyting worked fine
i installed reader to get .xlsx macro to work opening .pdf automatically
in explorer there was no way to set x pro back to default for opening .pdfs
i followed the information below, then acrobat x pro was listed in open with menu in explorer
https://community.adobe.com/t5/acrobat-discussions/how-to-make-pdf-default-adobe-acrobat-x-pro-instead-of-adobe-reader-dc/td-p/9871568
I know this is an old thread, but I thought I'd share an answer I discovered. After setting defaults for PDFs in Windows settings, launch Adobe Pro. Go to Edit, Preferences, General and scroll down to "Default PDF Handler." Change that value to Adobe Pro. The system will go through what looks like an install process, then it will want to reboot. After rebooting, PDF files open with Acrobat Pro rather than Reader.[actually makes the acrobat pro visible in file explorer context menu and it can be set as default]
more acrobat stuff
2023-07-02 Hotkeys and single key shortcuts that are enabled at Edit > Preferences > General
Crtl + Shift + N jump to page
2022-02-25 How to change the text box font
when using the Annotations [View->Comment->Annotations] Text Box

to change the font hit Ctrl + E.
this appears to open any secondary menu but it/they can't be docked and it appears that if 2 windows are open the menu always appears in the first window
This brings up the Text Box Properties window

Make the desired changes.
To make the new settings the default, select the text box, right click and choose this

2021-09-21
after installing acrobat x pro on elitebook everyting worked fine
i installed reader to get .xlsx macro to work opening .pdf automatically
in explorer there was no way to set x pro back to default for opening .pdfs
i followed the information below, then acrobat x pro was listed in open with menu in explorer
https://community.adobe.com/t5/acrobat-discussions/how-to-make-pdf-default-adobe-acrobat-x-pro-instead-of-adobe-reader-dc/td-p/9871568
I know this is an old thread, but I thought I'd share an answer I discovered. After setting defaults for PDFs in Windows settings, launch Adobe Pro. Go to Edit, Preferences, General and scroll down to "Default PDF Handler." Change that value to Adobe Pro. The system will go through what looks like an install process, then it will want to reboot. After rebooting, PDF files open with Acrobat Pro rather than Reader. [actually makes the acrobat pro visible in file explorer context menu and it can be set as default]
*****
Create a Text box with Comment->Add or Edit Text Box in right pane of Acrobat Pro [not reader].
To Edit the text or font/color/etc. Double click the text inside the textbox, then clik typwriter icon in the bar just below the menu (or Comment->Add or Edit Text Box). It appears there is a bug in this functionallity as it doesn't always work.
inserting .pdfs into .html pages and options
extract pages from existing .pdf into new .pdf with Acrobat Pro X with View->Tools->Pages->Extract
if there is a "publisher" security and password is unknown, import into google drive, then ctrl+p [print] pages of interest to new document (doesn't work for unknown "user" passwords) details
change the order of pages shown in two page view in Reader with View->Page Display->Show Cover Page in Two Page View. To change the default in Pro X File->Properties->Inital View->Page Layout->Two Up (Facing)
to have the pages show up in IE, open Acrobat Reader, Edit->Preferences, click Internet on the left column and select Display PDF in browser
Search seems to work much faster on work machine with Reader X 10.1.3 than on laptop. Perhaps because full verison?
edit an image in a .pdf by right clicking on the image, selecting edit page, then selecting edit image
two ways to make a .pdf print darker: accessibility advanced print dialog
help file F:\downloads\Adobe Encore help\encore_cs5_help.pdf
fireworks
help file "C:\RB\downloads 2021\Adobe Fireworks help pdf\fireworks_cs5_help.pdf"
to print out multiple images on one page (a cutsheet)
- import the images of interest
- select Print in the toolbar at the top righ to see the related items in the tools column on the right
- choose cutsom package
- drag images from the thumbnails at the bottom to the paper in the center
- add another sheet by clicking the "new page" button in the "Cells" dropdown's "Add to Package" area
- to save the layouts, in the Print Job dropdown area, choose JPEG for Print To
- alternately, it looks like the entire "job" can be saved by File->Export to Catalog
shortcuts
| <tab> |
hide and show side panels |
| <shift> + <tab> |
hide and show all panels |
| F |
cycle full screen mode |
| L |
dim the lights |
| ' |
flag the selected photo(s) |
| <ctrl> + / |
module specific shortcuts |
fill text with different color and erase background
Select -> Color Range then use picker to pick from one of the letters of the text
Edit - > Fill
kinda odd, click on the word "color" in the dropdown list box to pick the new color
Select - > Inverse
Edit - > Fill
kinda odd, click on the word "color" in the dropdown list box to pick the background color to make the text stand out
copy a layer with CTRL + J
2023-09-02 couldn't select a rectangle I drew to resize it
I think it was because it was in a group
I may have had a hidden object selected and not been able to see it.
per
a portion of this post "Just do a CTRL + D [Select->Deselect] and see if the Transform and Free Transform come back. "
help file at C:\RB\downloads 2021\Adobe Photoshop CS6 help file\photoshop_CS6_reference.pdf
changing google maps screen captures for printing:
brightness -78
contrast -25
text tool keyboard shortcuts
according to this video at 1:00ish, a shape's options such as a line's arrowheads can't be changed after the line is drawn
ctrl + shift + i = invert selection; useful in deleting everything but selection in a layer
to enable marquis zoom, turn off "scrubby zoom" below menu bar
priting multiple pics on one sheet with photoshop elements 6.0: open the desired pics in photoshop elements editor, then choose File->Print Mulitple Photos. This will open the Photo organizer. Choose File ->Print Photos, then under the "Select Type of Print" dropdown, choose Picture Package.
instead of drawing a box, just use the line segment tool 4 times
2023-03-02 wonder how many times I have tried to make a box outline instead of just using line segments
Outline a shape in Photoshop
how to outline a shape
Outline a shape in Photoshop [appears to only work in Photoshop Elements]
You can create an outline using any of the Custom Shapes.
1) Choose the Custom Shape you want, I filled mine with black (this will be removed later). Simplify it. [2023-03-02 Simplify may mean Simplify a layer feature that is in Photoshop Elments as described in this article. It appears that
does not exist in Photoshop (non-elements version)
].
2) Select the black shape with the Magic Wand and go to Edit>Stroke. Select the color you want, the pixel width and the location. I used light blue, 10 pixels and outside. Hit OK and deselect it.
3) Now select the black shape area with the Magic Wand and go to Edit>Clear. Deselect it. You should now have an outline of your shape in the color you want.
Make Text Stand Out in Photoshop [and Photoshop Elements]
Make Text Stand Out in Photoshop [and Photoshop Elements] - Create a Faded Blur Behind Text local .jpg
My easier to follow instructions:
In the layers pallete on the right, ctrl+click the T thumbnail of the text layer to marquee select around the text
Select->Modfiy->Expand and choose ~5-10 pixels to increase the selection size
Create a new layer and drag it below the text layer
Edit->Fill For contents group box Use dropdown, select Color. A picker appears to choose the desired color. After selecting the color, click OK in the Fill dialog.
This has created mask in a layer under the text
Select->Deselect
Filter->Blur->Guassian blur. As the radius slider is changed (on mouseup) the amount of blur is previewed in the image. Click OK.
To make it less bright, in the layers palette righ click the layer, then in the blending options group box, modifiy the Advanced Blending group box's Fill Opacity.
how to outline text per Adobe
To stitch / merge photos
1) Select the files in Adobe Bridge
2) Select Tools->Photoshop->Photomerge
3) When Photoshop opens, select the files and use auto (which works pretty good) or select options as desired.
1) Click and hold the eye dropper 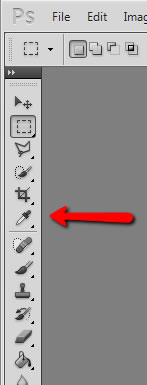 , then select the ruler tool
2)
Drag out what the ruler from point to point that is the new horizon
3)
Choose Image->Image Rotation->Arbitrary, click OK in the dialog
Marking [typically parallel] Distances
1) Measure a distance with the ruler tool
2) Drag the measured distance to the new location using the ruler tool (cursor turns to arrow with small ruler to indicate moving measurement rather than starting a new measurement)
3) Click and drag the ruler into the image - a non-printing light blue line is dropped. If desired, move the blue line by selecting the Move Tool  (hotkey m)
4) Use the blue line(s) to line up future shapes
Turn on Ruler
View-> Rulers or Ctrl+R
Change Ruler Origin
Drag the upper left intersection of the rulers  to the desired origin
Zooming
If the zoom begins on mouse down rather than a desired marquee select, turn off scrubby zoom in the options bar
Colors & Swatches
Since I hate the Photoshop color picker and default libraries, use the Swatches window in the right pane. If not visible, turn it on using the Window menu. Left click a color to make it the background color, and right click a color to make it the foreground color. When picking a color with the eyedropper, first right click to select the desired sample size area.
Patch Tool to Erase Text with Copy Background from elsewhere
Use Patch Tool  select destination radio button,
  then circle some background area and drag it over the text to clear; does some odd blending thing though
works better: use rubber stamp tool  , hold alt key and click an area to duplicated, then use the tool over the text to be erased
Lighting
see page 53 here
batch resize by percent
1) Open a file in Photoshop and play Image->Image Resize until desired percentage is determined. FOR GALAXY S5 IMAGES, 5% SEEMS TO BE ABOUT RIGHT.
2) ***** note that ORIGINALS WILL BE OVERWRITTEN, SO USE COPIES IN A TEMP DIRECTORY *****
3) COPY the files to be resized to a directory "test" on the desktop, then create a "small" sub-directory
4) Choose Window->Actions
5) Click on "Default Actions" at the top of the pane, then click the folder icon at the bottom of the pane. Give it a name at the "New Sets" dialog, such as "5_percent_overwrites"
6) Click the sticky note looking icon to create a new action
7) Give the New Action a Name, such as "shrink_then_overwrite" and click the record button
8) Choose Image->Image Size, put in 5 and percent in the Pixel Dimensions boxes and click OK.
9) Choose File->Save, click OK
10) Click the stop button in the Actions pane.
11) Choose File->Close to close the current image.
12)
Choose File->Automate->Batch, choose the Set and Actions created earlier, then pick the "test" directory for source and the "test\small" directory for Destination.
13) All the files are now smaller. Take one set and copy to rbwebsite
14) When modifying .html, can use "dir /b > files.txt" and MS Visual Studio using Alt + mouse selection to paste standard parts of each link.
video
-NOTES:
(1) Have to choose save as during recording to avoid "what .jpg compression" dialog.
(2) When this is done and batch is run, it will overwrite files in the directory selected during recording as well as save them to the new directory
bettter Google Maps printing of a screen capture
brightness -93 contrast -50 adjustments panel brightness/contrast
if on other pallete, click the left arrow at the bottom of the pallete
making a distance callout
procedure is here, but use Analysis menu in my version rather than Image -> Analysis
photoshop elements
turn off downloader when USB inserted 2
powerpoint
import an entire directory of images, putting one on each slide article
must rotate any horizontal ones by selecting the checkbox next to the filename in the dialog, then using the rotate image button
bridge
missing my pictures folder -> "Show Hidden Files" option in the View menu
panorama merge / stitch with photoshop by doing open in bridge to select desired files, then choose
tools->photoshop->photomerge
flash
2012-08-17 deleting flash plugin on Windows XP (mine was flash10i.ocx)
essentially i did this: take ownership of the file, delete the DENY permssion, delete the file
When you try to delete flash plugin (flash6.ocx, flash10c.ocx) from %windir%\system32\Macromed\Flash folder, you get "permission denied" even if you're the owner of the directory. The reason is that Flash plugin installer sets DENY WRITE permissions in NTFS ACL for this file, and DENY permissions rules always override ALLOW rules. So when you try to delete even you're the owner of the files, you're denied to do that :)
To fix this and delete the file, first run regsvr32 /u <path_to_file> command to unregister the file (if it's registered in the system). Then you have to open file properties, go to "Security" tab, click "Advanced" button and remove two "Deny" entries there. Then you won't have any problems deleting the file.
soundbooth
click on the ruler  to set the start position, when playing it will leave a ghosted start point
Preferences>General and check the "Return to Start Position on Stop"
use  to select a range
loop the range by selecting the Loop button in the play/record controls or hit Ctrl-L. Hit M to add a marker. Right click to change a marker point to a range. Drag to change the range. more info
illustrator
Insufficient memory to complete operation error when trying to export to jpg is random and not fixed.
I tried to import into photoshop and it came in as layers so i just took a screen capture of the Illustrator window 2023-03-15

post says Choose Object > Artboards > Fit to Artwork
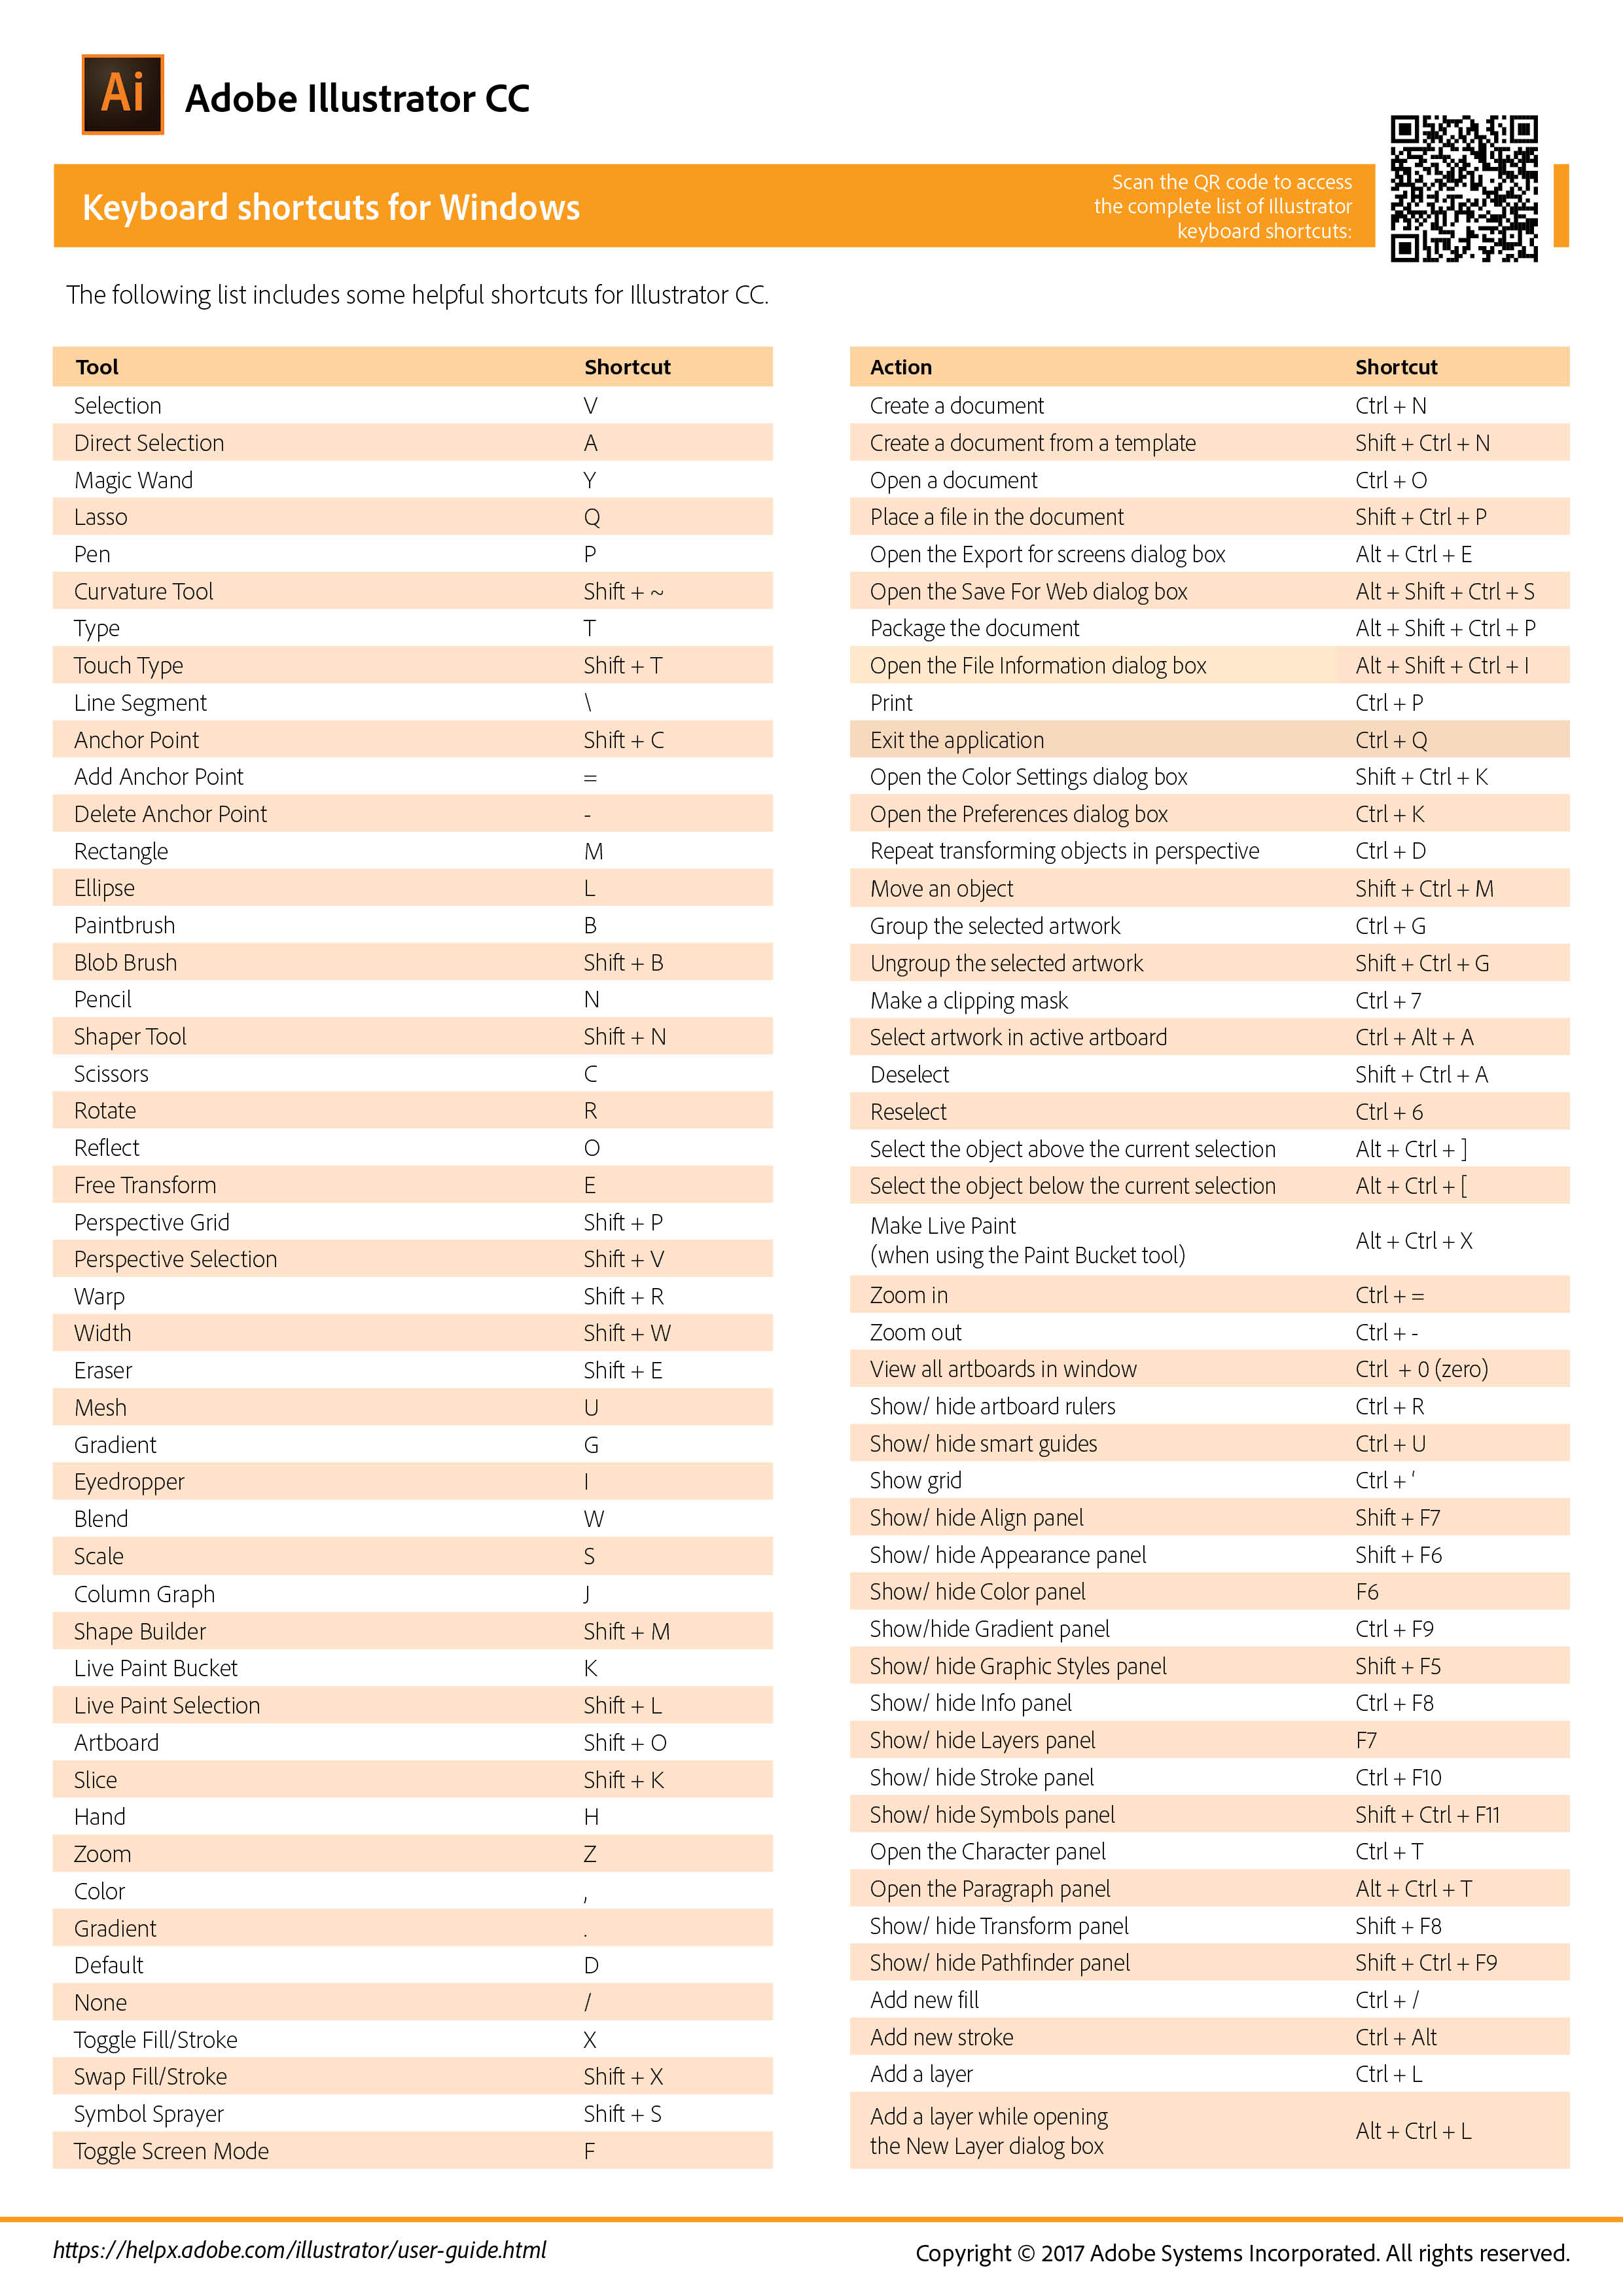
2023-01-11 shortcuts .html grouped and all together .jpg (local all together .jpg)
2022-05-12 to get the arrowheads menu to show up, click the word stroke:

2022-02-27 how to make a dashed line from this video [method 2]
Choose Window->Appearance then Stroke then check the Dashed Line checkbox

change text color: the picker in the upper right of the picker is the "base" part of the font, the picker in the lower right is a fuzzy outline "stroke"
to change the size of a .jpg, use the "Artboard Tool" (9th from bottom, rectangle with corner highlights) to draw out how it should look, then do File->Save for Web and Devices
probably same as
File -> Document Setup -> Edit Artboards button (then drag edges)
to add artboards use Window > Artboards
change text box size without scaling text